
For a lot of homeowners, the garage slowly becomes the room where everything ends up. Boxes get stacked in corners, tools sit on the floor, and the concrete starts showing oil stains, cracks, and years of wear. Before long, parking the car inside feels like an afterthought.
A garage makeover does not have to mean completely rebuilding the space. A few well-planned improvements can make a surprisingly big difference. One of the most noticeable upgrades is the floor, but it is also one of the first things homeowners want to understand the cost of.
If you are trying to figure out your garage floor coating cost, it helps to look at the entire project in stages. That makes it easier to set a realistic budget and decide which improvements are worth doing first.
1. Start by Clearing and Measuring the Garage
Before choosing materials, get the garage empty enough to see what you are working with. This is also the best time to measure the floor.
Measure the length and width of the usable floor area and multiply them to get the approximate square footage. For example, a 20-by-20-foot garage has roughly 400 square feet of floor.
Read More: Building Trust Through Transparent Digital Design
The square footage is one of the biggest factors in determining coating cost. A larger garage requires more material and labor, while smaller spaces may have a higher cost per square foot because there is still setup, preparation, and cleanup involved.
Do not forget about the condition of the concrete. Cracks, damaged areas, old coatings, and heavy stains can require additional preparation before a new coating can be installed.
Practical tip: Take photos of the entire garage and close-ups of cracks or damaged concrete before requesting estimates. It gives contractors a much better idea of what preparation may be required.
2. Understand What Goes Into Garage Floor Coating Cost
Not all garage floor coatings are priced the same, and the cheapest quote is not necessarily the best value.
The final price can depend on the coating system being used, the size and condition of the concrete, the amount of surface preparation required, and the type of finish you choose.
A professional full-chip system, for example, typically involves preparing the concrete, applying a base coat, spreading decorative flakes, removing excess flakes, scraping and cleaning the surface, and applying a protective topcoat.
If you want to get a rough idea before talking to a contractor, you can use this http://www.orgaspaces.com/ garage floor coating cost guide and calculator to estimate your project.
Practical tip: When comparing estimates, ask what is included in the price. A quote that appears cheaper may not include crack repair, grinding, moisture testing, or other preparation work.
3. Prepare the Concrete Properly
The preparation underneath the coating is one of the most important parts of the project. A great-looking coating will not perform well if it is installed over a poorly prepared surface.
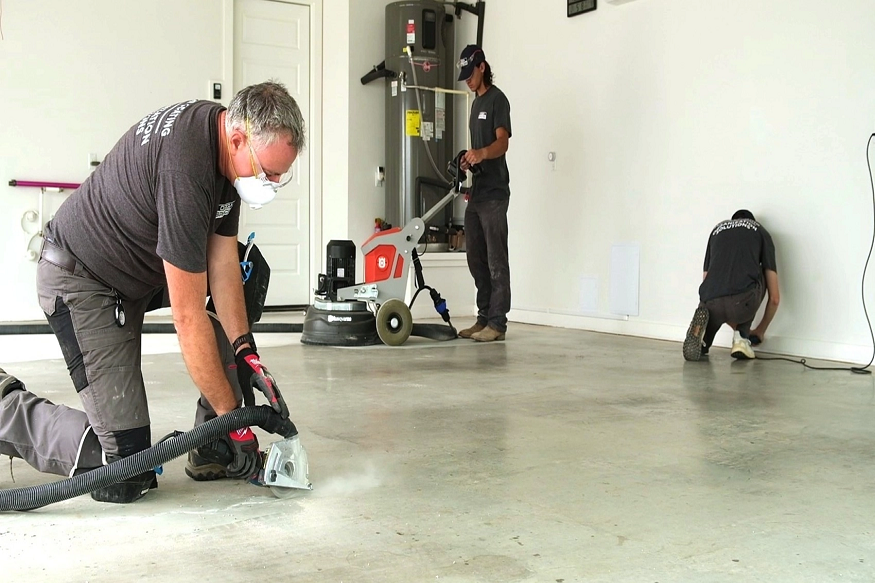
Professional installers commonly mechanically prepare the concrete to remove contaminants and create the right surface profile for the coating. Oil, grease, old paint, and other contaminants need to be dealt with before the coating goes down.
Cracks and damaged concrete should also be evaluated and repaired when necessary.
This is an area where trying to save money can backfire. If the surface is not properly prepared, adhesion problems or premature wear can occur.
Practical tip: Ask your installer how they prepare the concrete. If the answer is simply “we clean it and apply the coating,” ask for more details about the preparation process.
4. Choose a Floor That Fits How You Use the Garage
The right garage floor is not just about appearance. Think about what actually happens in your garage.
If you work on cars, have heavy equipment, park multiple vehicles, or frequently move tools and storage around, durability should be a priority. If the garage is mostly used for parking and storage, you may have more flexibility when choosing the finish.
Decorative flakes are popular because they add texture and help hide small amounts of dirt and everyday wear. A textured surface can also provide more traction than a completely smooth floor.
Color matters too. Very light floors can make a garage feel brighter but may show dirt more easily. Darker colors can have the opposite effect.
Practical tip: Look at actual completed garage floors rather than relying only on small color samples. Lighting can make the same coating color look very different in a showroom compared with a garage.
5. Add Storage After the Floor
Once the floor is finished, it becomes much easier to rethink the rest of the garage.
Instead of keeping everything on the floor, consider using wall-mounted storage, cabinets, shelving, or overhead systems. Getting tools, seasonal items, sports equipment, and other belongings off the floor can make the garage feel dramatically larger.
Read More: Smart Blinds Are No Longer Luxury: The Trend Transforming Leeds Homes
A good storage plan should start with the things you actually own. Take an inventory before buying cabinets or shelves. You may discover that certain items need tall storage, while others are better suited to drawers, wall hooks, or overhead racks.
Leave enough open floor space for vehicles and for walking around them comfortably.
Practical tip: Store frequently used items between waist and shoulder height. Less frequently used items can go higher or into overhead storage.
6. Finish the Details That Make the Garage Feel Complete
Once the floor and storage are handled, smaller improvements can make the space feel finished.
Fresh paint can brighten dark walls. Better lighting can make it easier to work on projects and find things. Simple additions such as wall organization, workbenches, or a dedicated area for tools can also make the garage more functional.
You do not have to complete everything at once. If the budget is limited, prioritize the improvements that will have the biggest effect on how you use the space.
For many homeowners, that means starting with the floor and basic storage, then adding lighting, cabinets, paint, and other features over time.
Planning Your Garage Makeover
A garage makeover is easier to budget when you break it into individual projects instead of looking at one large number. Start with the size and condition of the concrete, get a realistic estimate for the floor coating, and then decide how much of the remaining budget should go toward storage and other improvements.
Most importantly, think about how you actually use the garage. A good makeover should make the space easier to clean, easier to organize, and more enjoyable to use. With a little planning, even a cluttered concrete garage can become a clean, functional part of the home.